How to Remove the Background from a Photo
Published 2026-07-01 · Try Background Remover
Cutting out a subject from a photo used to mean twenty minutes with the pen tool in Photoshop. Now you drop an image into a browser tab and the AI handles it in a few seconds. No software to install, no account to create. The AI model downloads once, caches itself in your browser, and runs entirely on your device from that point on.
What you need
A browser. That’s it. The tool loads an AI model the first time you use it, caches it, and runs everything locally on your device. No account, no install. Chrome, Firefox, Safari, and Edge all work on desktop. On mobile, Chrome and Safari on modern phones handle it fine — processing is slower since phones have less power, but the results are the same. You can even disconnect from the internet after the first load and the tool keeps working.
Step 1 — Upload your image
Go to the Background Remover and drop your photo onto the page. You can also click the upload area to browse your files. PNG, JPG, WebP, AVIF, GIF, BMP, and TIFF all work as input. If you drop an animated GIF or animated WebP, the tool processes each frame individually and gives you an animated result with the background removed from every frame.
Step 2 — Pick a model
There are three AI models to choose from. Each one is a different neural network with a different balance of speed, download size, and edge quality.
- Fast — 4.7 MB download. A lightweight segmentation model that works well for clear subjects on simple backgrounds. Use this first. If the result looks good, there is no reason to switch.
- Portrait — 44 MB. Trained specifically on people. It handles hair, skin edges, and fine strands much better than Fast. Pick this for headshots, group photos, or any image where a person is the main subject.
- Best — 176 MB. The largest and most accurate model. It produces the tightest masks with the least halo on any subject — people, products, animals, or complex scenes. Use it when edge quality matters more than speed.
The model downloads once on first use and gets cached in your browser. Every subsequent run loads it from cache instantly. If you switch between models, each one downloads and caches independently.
Step 3 — Download the result
Hover over the output and grab your transparent PNG. Drag the slider below to see the difference between the original photo and the result.
Download: original · background removed
The background is gone. The edges around the hair are clean — no halo, no leftover fringe. The model identified the subject, created a pixel-level mask, and applied it as an alpha channel to produce a transparent PNG.
Tips for better results
Use a photo where the subject is clearly separated from the background. Strong contrast between the subject and whatever is behind it gives the model less guesswork. A person in a dark shirt against a dark wall is harder than a person against a plain background. If you have control over the shooting conditions, a solid-colored backdrop makes the result nearly perfect every time.
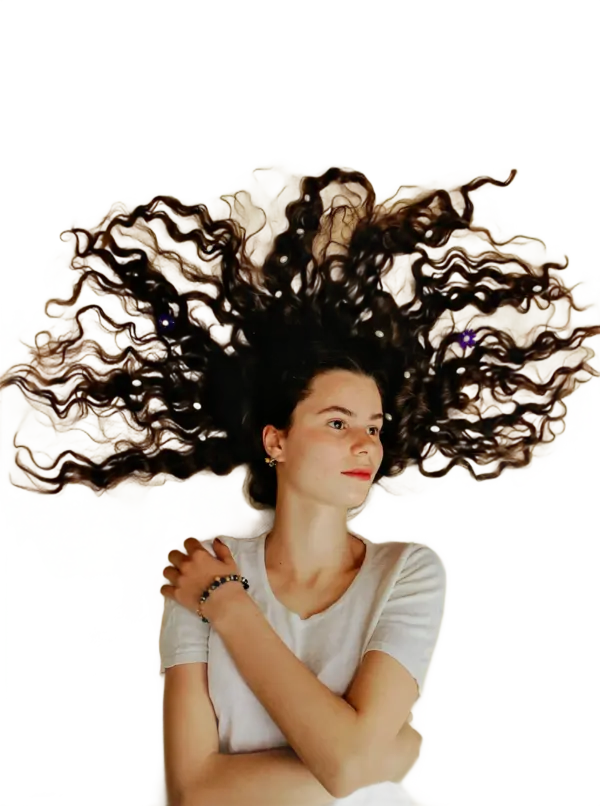
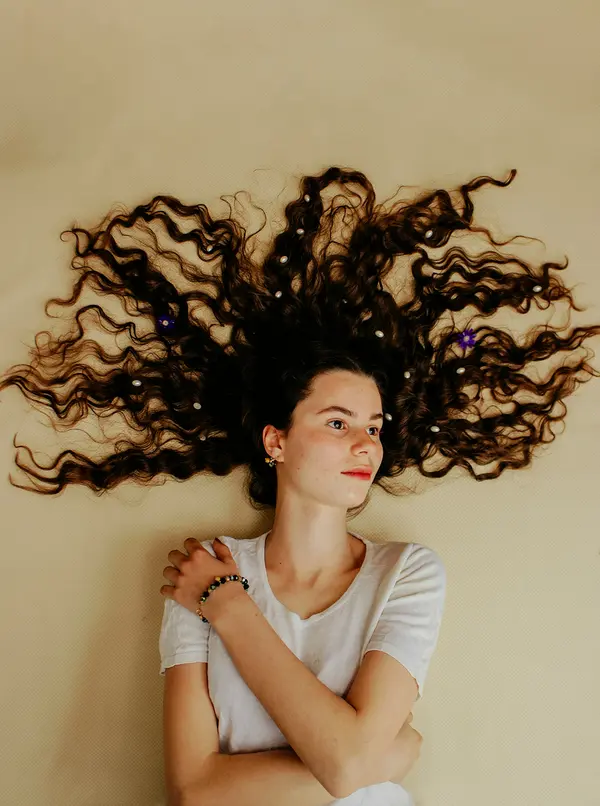
Try Portrait mode for people. The Fast model works well for most subjects, but hair is where it struggles. Portrait is trained specifically on people and handles curly hair, flyaways, and fine strands much better. If you see jagged edges around someone’s head, switch to Portrait before trying Best. The difference is visible immediately — strands that were cut off with Fast come through cleanly with Portrait.
Check the edges on dark backgrounds. After removing the background, switch the preview background to black. White halos that are invisible on a light preview show up immediately on dark. If you spot them, try the Best model — it produces the tightest edge masks. This matters especially for images that will be composited onto dark designs or used as overlays on video.
Zoom in on the result. The thumbnail view can hide rough spots around fingers, earrings, glasses, and thin objects. Open the image in a new tab at full size before using it in a final design. Edges that look smooth at 50% zoom can show stairstepping at 100%.
What about product photos?
Same process. Drop in a product shot and the AI isolates the item. The Fast model usually handles products well since they tend to have clear edges against a studio or tabletop background.
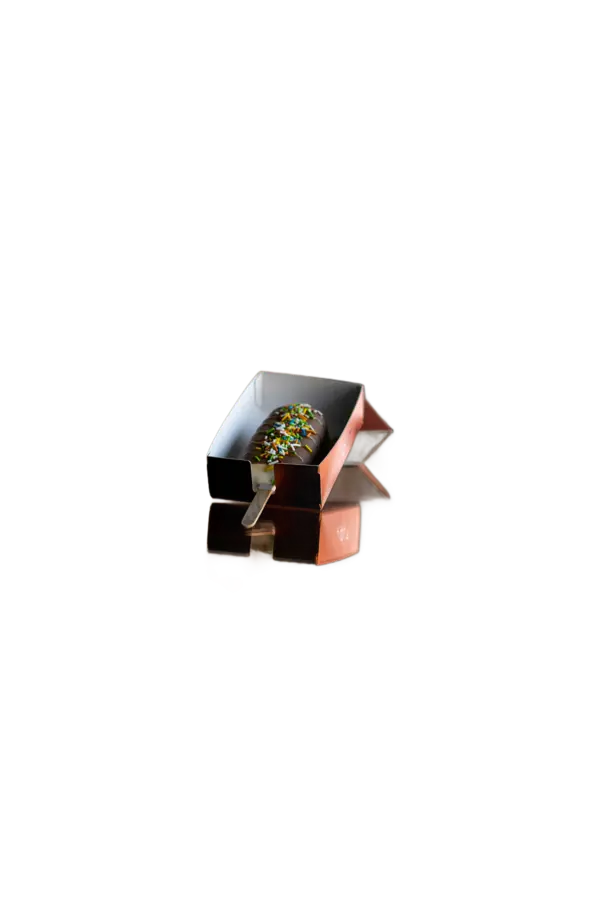
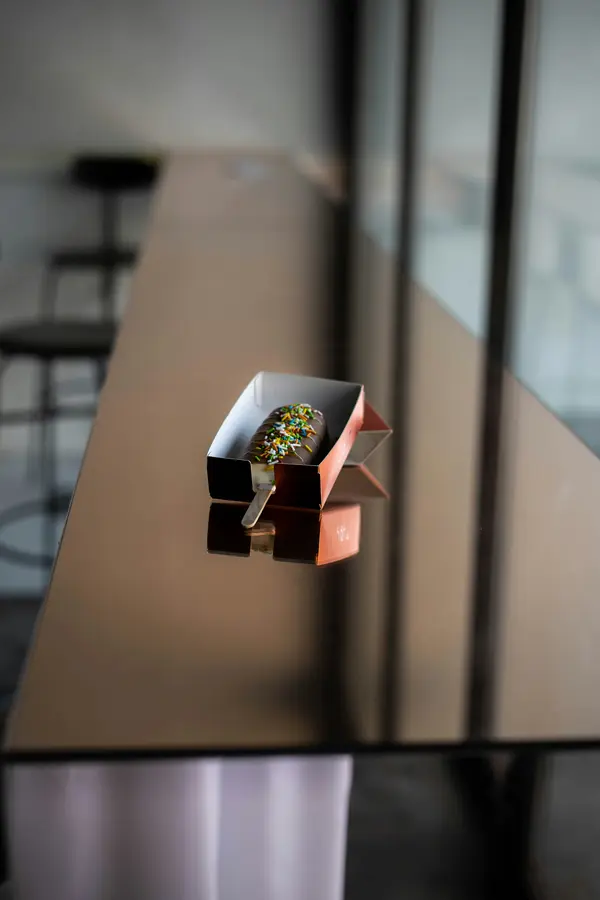
Download: original · background removed
Sellers on Amazon, Etsy, and eBay need white backgrounds for product listings. Amazon specifically requires a pure white (RGB 255,255,255) background for main product images. Their style guide mandates that the product fills at least 85% of the frame. Remove the background here, then place the item on white in any image editor — or just export the transparent PNG and let the marketplace platform add the white fill. No photo studio needed, no per-image editing fees.
eBay and Etsy are less strict about pure white but still recommend clean, distraction-free backgrounds. A transparent PNG gives you the flexibility to place the product on any color without reshooting.
What about pets?
Fur is harder than smooth edges. Individual hairs blend into the background and the model has to decide where the animal ends and the backdrop begins. The Best model handles this well — it produces a tighter mask that preserves fur detail without creating a visible halo around the animal.
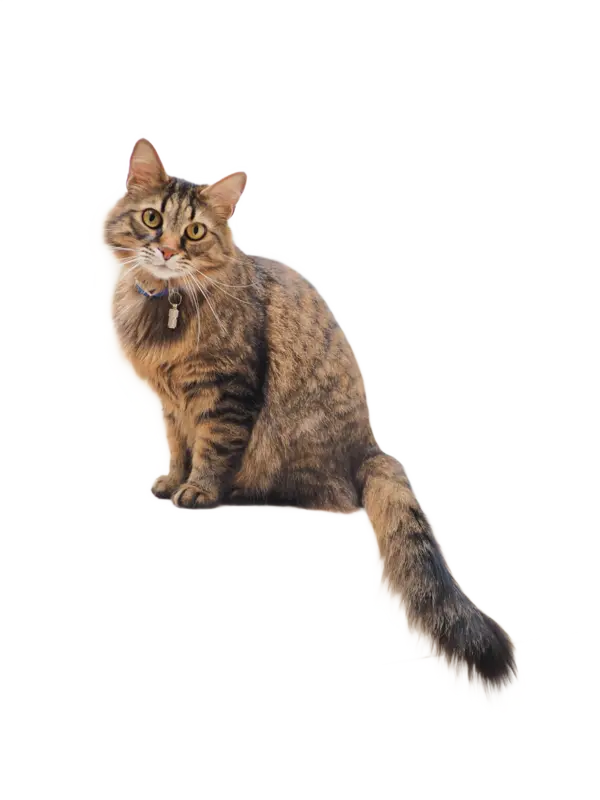
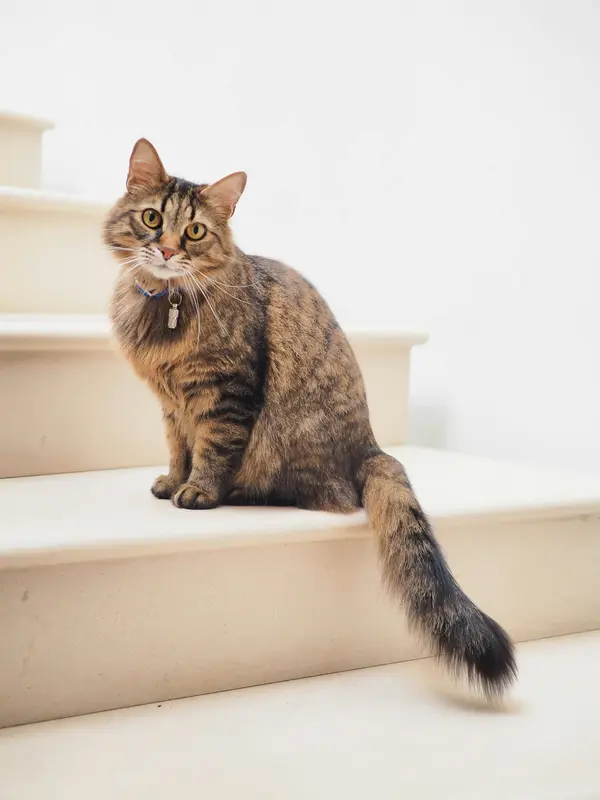
Download: original · background removed
If you are cutting out a pet with very light or white fur against a light background, try increasing the contrast of the original photo first. That gives the model a clearer boundary to work with. Dark-furred animals against light backgrounds are the easiest case. Long-haired breeds with wispy fur are the hardest — the Best model is worth the extra download time for these.
What about animated images?
If you drop an animated GIF or animated WebP, the tool processes each frame individually. It runs the segmentation model on every frame, removes the background from each one, and reassembles them into an animated WebP with transparency. The output preserves the original frame timing and loop count. This is useful for removing backgrounds from short video clips exported as GIFs — reaction images, product turntables, or social media content.
Processing time scales with the number of frames. A 30-frame GIF takes roughly 30 times longer than a single image. The Fast model is a reasonable choice here since processing time adds up quickly with the larger models.
How does this compare to remove.bg?
remove.bg uploads your photo to their servers for processing. The quality is good, but your image passes through a third party. They offer 1 free preview per image at reduced resolution and charge for high-resolution downloads — $1.99 per image or from $0.14 each on bulk credit packs.
MediaShed runs the AI entirely in your browser. Your photo never leaves your device. Every download is full resolution. There is no per-image limit and no watermark. The tradeoff is that processing depends on your device — a laptop handles it faster than a phone, and the Best model needs a few seconds even on fast hardware.
For batch processing of hundreds of images, a server-based tool like remove.bg is faster since it offloads compute. For one-off edits, portfolio work, or anything where privacy matters — client photos, ID documents, medical images — local processing wins. You get the same quality without trusting a third party with your files.
Troubleshooting rough edges
If the result has rough or jagged edges:
- Switch to a better model. Fast → Portrait for people, Fast → Best for everything else. The quality jump is significant and this alone fixes most issues.
- Check the image resolution. Very small images (under 500px on the longest side) give the model less to work with. If you have a larger version of the same photo, use that instead. The model works at a fixed internal resolution and downscaled inputs lose edge detail.
- Look at the background complexity. Subjects that overlap with similarly-colored backgrounds are hard for any model. A brown-haired person against a brown wall, or a green plant against green foliage. If the result is rough in one spot, the original photo is probably ambiguous there too.
- Try a different crop. If only part of the subject is in frame — a hand reaching out of frame, hair cut off at the edge — the model has less context for where the subject boundary is. Including more of the subject in the frame usually improves the mask.
Privacy
Your photo never leaves your device. The AI model runs entirely in your browser using WebAssembly. No server, no upload, no storage. Close the tab and everything is gone. If you work with client photos, medical images, or anything sensitive, nothing is transmitted over the network at any point during processing. The only network requests are the initial model download and the page assets — both cached after first load.